


After that I then put the other sides of the boards on and tacked them together. Again since these boards are so thin ad I don't want to split them, I've drilled pilot holes.

Because I really want this thing to be permanently together I took out my trusty hot glue gun and filled the gap between some of the foam and board. This is now one solid board!

Now I need to cut out where my simple bridge goes. I lined up the pieces and cut around it. I don't need to cut out the inside since it will provide extra support for the cobblestone pattern. Once it's in place, I hot glued it down.


Since I want to use up some of my remnants of leftover cobblestone, I had to do the bridge in two pieces. I didn't want a hard line separating them (would be extra obvious where the two sheets met so I cut some different angles. Unfortunately I made them a little too small, so now the creation of the road takes a creative turn. I'll now make it in disrepair and cover patches with dirt as if it's slowly being taken back to nature. As usual, a liberal dose of hot glue locks it in place.

Since I want to make the hills look more like one piece and less like I cut them with a foam cutter, the next step involves a lot of spackle. I use it not only to cover the hill facing, but to cover up some of the gaps between the foam and board. I also use it to cover over parts of the bridge. I call this the 4 year old stage since I'm absolutely covered in spackle by the time I'm done.

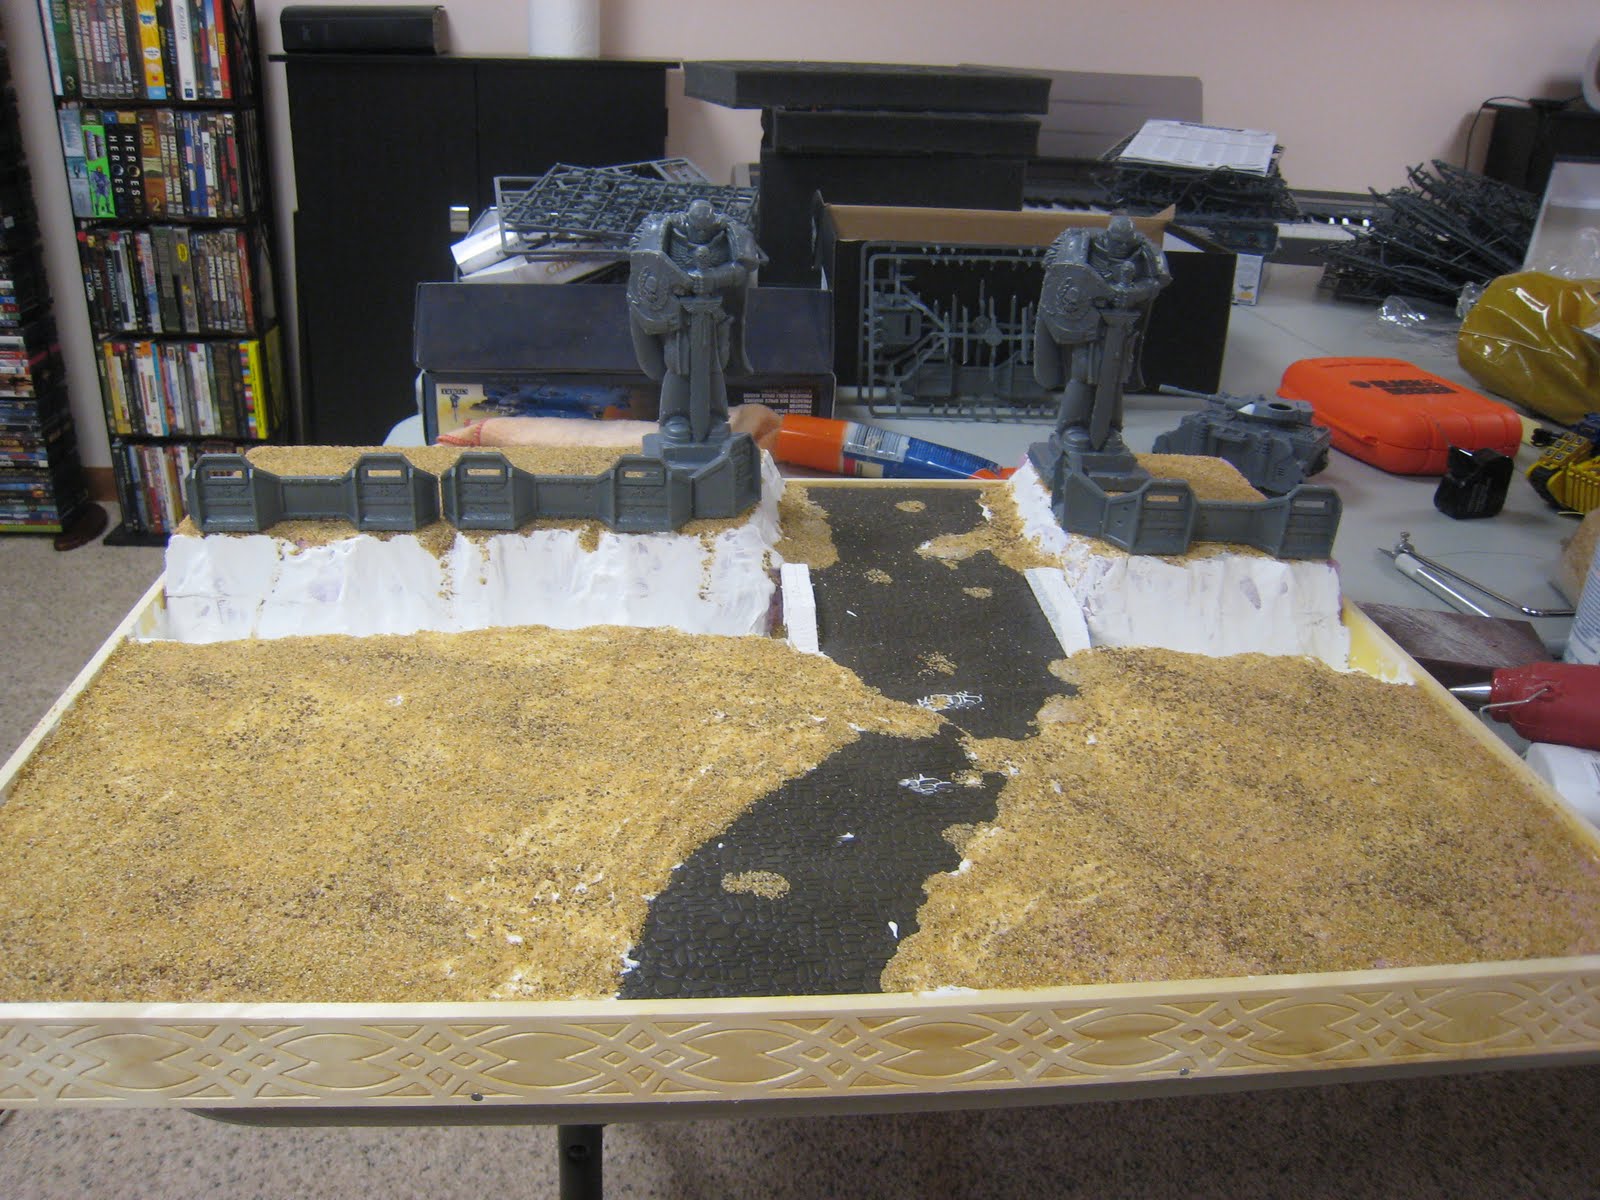
This stage requires at least 12 hours to dry, so I put the project down for the evening. The next day I sand down any spackle that overlapped the trim and start spreading down patches of glue and applying the hobby sand. Again, lots of mess involved.

After a few hours I know it's dry so I shake off the excess sand and I'm ready to go to the next stage of painting. Here's the board on where it stands now.
I'll hopefully get some painting in this weekend. As usual, I'm traveling for work this week - this time out to Seattle.
Sickness, I love it. I can't wait to build mine.
ReplyDeleteCracking stuff. Great work coming together beautifully.
ReplyDelete