Sunday, December 21, 2014

Cerastus Knight Lancer with more Stabby!

I finished up my first of the Cerastus Knights, with the Lancer.  My oh-so-helpful cat jumped on it while I was painting him and snapped the lance banner off, so I'll swing by the hobby store to pick up some jewelry chain to fix the banner.  As with all my knights, they are magnetized at the torso to help for transportation.

I tried to keep him pretty simple and followed my color scheme I've been running with the Knights Angelus.  


For the base, I used Dragonforge's ancient ruins and added in some pillars from Secret Weapon Miniatures.


Decals were a mixture of the standard knight ones and that limited run decal pack (I wish I would have picked up more)


Next up on the docket is a ton of bikers, it may be a certain adepticon project... hint hint!  I'll leave you with all my knights lined up in their smashy glory!

Tuesday, December 9, 2014

Imperial Knight Paladin #2 - with Suns!

Yeah yeah yeah, I have a thing for suns.  A little borderline obsession.  Here's my homage to my Imperial Suns, adding the sun in splendor in the heraldry of this Knight Paladin.


For the basing, I ended up making up my own on this one.  I used some card stock for the squares and some of the Lord of the Rings terrain (which is awesome).


I'm getting close to finishing up my Knight Lancer, pics to follow along with some terrain picture updates!

Saturday, December 6, 2014

Imperial Knight Errant

It's been forever since I've posted last but no lack of work.  I finished up my first three knights and am working on some of the forgeworld ones.  In addition I've done a ton of necron stuff and have been working on terrain both for 40k and Infinity.  More posts to follow!

Here is my completed Knight Errant.  I went with a sinister approach with the heraldry on this one and figured I could double him as Grimauldus if I need to in a pinch.


The basing was from Dragon Forge Design.  I used the sanctuary basing and added in a broken column.  Added a little grass and dead leaves to break up the color.


Back to sorting out my gaming area.  It's been a big project getting the basement where it needs to be.  We have our first baby on the way in a few months so I need to have my fortress of solitude to escape to!

Thursday, August 21, 2014

Massive Infinity Terrain Part 1

There has been a lack of posts lately, my apologies... but no lack of hobby action.  I'm almost finished with two more Imperial Knights (posted as soon as they are done) as well as a Warhound Titan.

Since it is the summer I know I need to make the most of the good outdoor weather for priming.  With the next generation of Infinity coming this fall and my desire to make my basement a gaming mecca, I've decided to get my butt outside and start painting all this terrain I've been collecting.

The thought about painting all of that was daunting.  Finally my friends convinced me to get over the fear and really make the most out of spray paint.  They taught me some cool tips to get the first few coats of paint down in minimal time.  My Home Depot trip was a lot of fun... got a ton of different colors all for about the cost of 5 cans of GW black primer.

Got some strange looks from the cashier
Here's all the terrain I've been building... lots of manufacturers!  My goal is to have at least two full tables of "modern-day" terrain, 2 full tables worth of futuristic city terrain, and a jungle board for Paradiso.  Almost all of the buildings allow to get inside each floor.

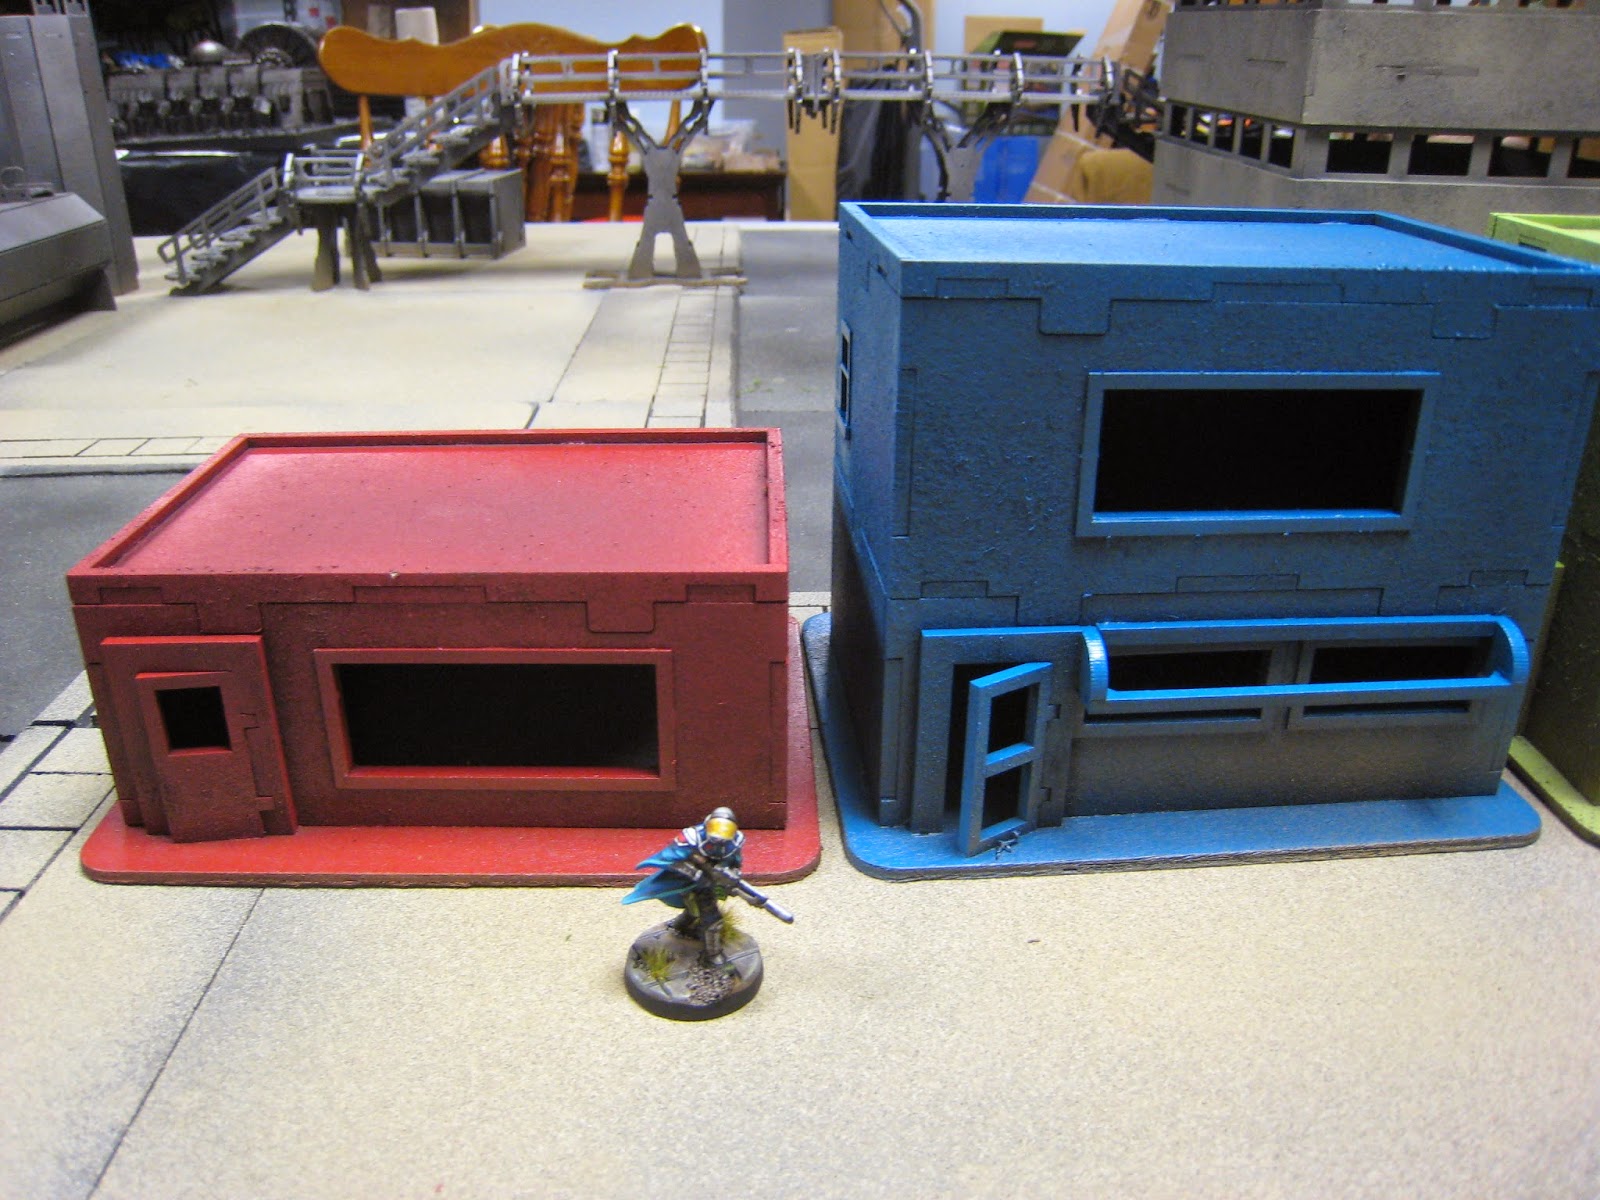
Demo's Laser Cut Designs: Shops, and Office Building
Sarissa Precision: Modern day houses, and all of the silos
Warmill: Futuristic linked buildings and shipping containers
Impudent Mortal: Holo bilboards and signs
Micro Art Studios: The "official" infinity terrain and bridges
CNC Workshop Miniature Scenery: Very cool infinity style buildings and the awesome walls

NOTE: All of the terrain you're about to see has only been started with spray paints.  My goal is to get everything painted to the first level with sprays, then go back and start detailing.  This way I can have playable scenery out of the gate while I work on the finer points.

Now to meet our host... Louie the Loup-Garous.  He'll be showcasing everything where it is now.

Louie says hello
I started with my basic tiles I'm going to use for some tables.  I decided that until all the cool Secret Weapon Minature tables come, I'll make some quick 1'x1' squares out of MDF that can be used as street tiles.  I started with a grey spray paint then used the textured asphalt looking spray and concrete looking spray.  I then went back on the asphalt and hit it with black.  I'll have to go back as some are a little light.

Tiles baking in the sun...took forever to dry
Here's a big batch spray paint of all of the cool buildings from Warmill.  I really dig out they fit together, they're very versital.  I'm going to go with a real light bluish white.  I'll go back and add orange striping and accents.  Trying to keep some of the terrain bright.


Here's the rapid fire shots of all of the first level spraying of the other buildings I knocked out.  All in all, I probably spent about 6 hours of spraying.  Not too shabby!


they stack or are great stand alone

these will look great with awnings and some detail


Finally, I started spray basing the 6 tiles from the new GW boards as well as I picked up two of the manufactorum tiles from forge world.  I'm going to see if I can get some infinity work especially out of the forge world tiles.  Not sure how well they'll play for 40k, but I technically can now get 8 feet out of it.


Phew, this is stage one.  I still have twice as much bare MDF yet to spray!  Lots of little things, and a ton of scatter terrain (cars, vending machines, etc.) I can't wait to go back and start adding posters, graffiti, weathering, etc.  I'll also knock out another 4 foot square set of basic street tiles.

Monday, June 2, 2014

A Base for Something Big!

With the craziness of 7th edition 40k hitting I decided to work on cleaning my basement... this is no easy task.  In the process I stumbled upon some large pieces of resin that have been collecting dust.  I decided to tackle one of them right away.

I'm going to try and take a break every so often from painting armies to work on a unique piece... something that doesn't necessarily have any bearing on a "list" I'm working on.  That'll allow me to finally get some paint on the cool models I own but never make the time to paint.

I'm about half way through painting the first monstrosity.  It's huge!  I went to the craft store and picked up a giant wooden base and began working on it.  Here's where it stands so far.


I'll get some progress shots of the model this week, I bet you can't guess what it is!

Monday, May 19, 2014

Imperial Knight Paladin Finished!

First one is done!  Yeah that's right, finally got my first knight titan finished.  What a fun model.  Lots of areas I was able to completely load up on heraldry.  I decided to go with house Hawkshroud.  They are all about noble houses that pledge themselves to causes.

In the fluff it talked to extended campaigns where they're assigned.  I figure this could be the tie into my Knights Angelus color scheme (and dark angels icons).  So I redid their normal yellow colors in a similar scheme as my imperial force.


One thing I changed up a bit from the normal knight heraldry was the placement of the divisions on shoulder pads.  I have the campaign/house stuff on the right side and the personal heraldry of the knight on the left.  It appears that in the books they go front/back vs. left/right.  I like mine better, but it means that I'll have a hard time using the imperial knight transfers since they're set up for the GW method.  

I had a blast going with multiple decals.  It looks like heraldry overload, but I wanted that Bretonian look.  I spent extra time with Micro Sol and Micro Set to get the decals smooth.  In addition I worked up ard coat below and above the decal.  Then put a coat of matte coat over the top.  Anything red/white/black was a satin finish.  Golds were done in gloss ard coat.  


The base was a dragon forge design with my etching of the dark angels symbol.  I added in some grass and fake leafs.  


I really, really enjoyed this kit.  It took me awhile as I figured out the best method to paint it up.  Painting multiples will be a bit daunting but I'm going to jump right in.  I may go back and clean up or extra detail certain parts, but for now it seems to work.

Next up on the docket are a few leman russ tanks!

Friday, May 16, 2014

40k 7th Edition Live for Pre-Order

Yep, that's right.  Head on over to Games Workshop Pre-Orders to get your copies for the May 24th launch.  It looks like the big "gamers edition" that they usually do adds a few pieces of product that isn't available for general pre-order yet.


It contains all this stuff for $340

$85 - Rulebook (able to be ordered)
- Galaxy at War (part of the rulebook combo)
- Dark Millennium (part of the rulebook combo)
- Mini Rulebook (not yet, they'll hold this as a incentive to get people to buy this thing)
$74 - Visions of Dark Millennium (able to be ordered, art book)
$8 - Objective Cards (able to be ordered)
$15 - Psychic Cards (able to be ordered)
- 6 objective tokens (part of this kit)

I was completely off on my earlier assumption, didn't realize all the stuff that was included in the normal $85 price.

That would be $182 of "known" value.  If the mini-rulebook is $50, the value of the core of the kit is only $232.  That means the tokens and the fancy box are about $100 in value.  I guess that and the quick reference guide.  I'm now feeling like I got swindled a bit.  Ah well, should have done my calculations before I hit "order"!

Not sure if I really care about some of the books but I'm a sucker for 40k.

On to the 7th edition!

Wednesday, May 14, 2014

Titan Base with Dark Angels Symbol

I got some Titan bases in from Dragon Forge, and I figure I would add a little custom symbol in to make it a little more unique.  I absolutely love the two ranges, Sanctuary and Ancient Ruins.  This base was originally from the Ancient Ruins side.  All of my imperial armies use some variations of these bases.

I thought to give it a little custom flair, and since I am "Knights Angelus" (basically silver dark angels), I'd break up the basing a little with the Dark Angels symbol.  Since I love gold, I planned on just painting it on.  After sketching in the symbol, I thought it would look cooler if I etched it in.

So I broke out my dremel and put on the etching bit and went to town.

Here's where it stands right now.  I think I'll wait to finish it off until I place the model on.  Then I may add some water effects and a little bit of grass growing in where the stone breaks up. That will also break up the base and add some interesting elements.  I also have a soft spot for the fake leafs and will add those in as well.


Didn't get a chance to take a shot of my progress on the knight, but the legs are 90% done and the torso and shoulder pads are about 75% done. It's been a lot less mind numbing by breaking it into pieces for painting.
Related Posts Plugin for WordPress, Blogger...